Your first charge
This walkthrough creates a customer, registers a charge, and shows the collection rule taking over. It takes about five minutes.
1. Register the customer
- In the sidebar menu, open Customers and click New Customer.
- Fill in the Basic Information: Name is the only required field, but also provide the Document Type (CPF or CNPJ) and the Document Number — that is how the system deduplicates records and how the debtor confirms their identity on the portal.
- Add at least one email or phone number. Without a registered contact, the rule has nowhere to send messages.
- If the customer came from your ERP or another system, fill in the External ID with that system's identifier. This prevents duplicates in future imports.
- Click Save.
You can also bring in your entire portfolio at once by spreadsheet — see Import.
2. Create the charge
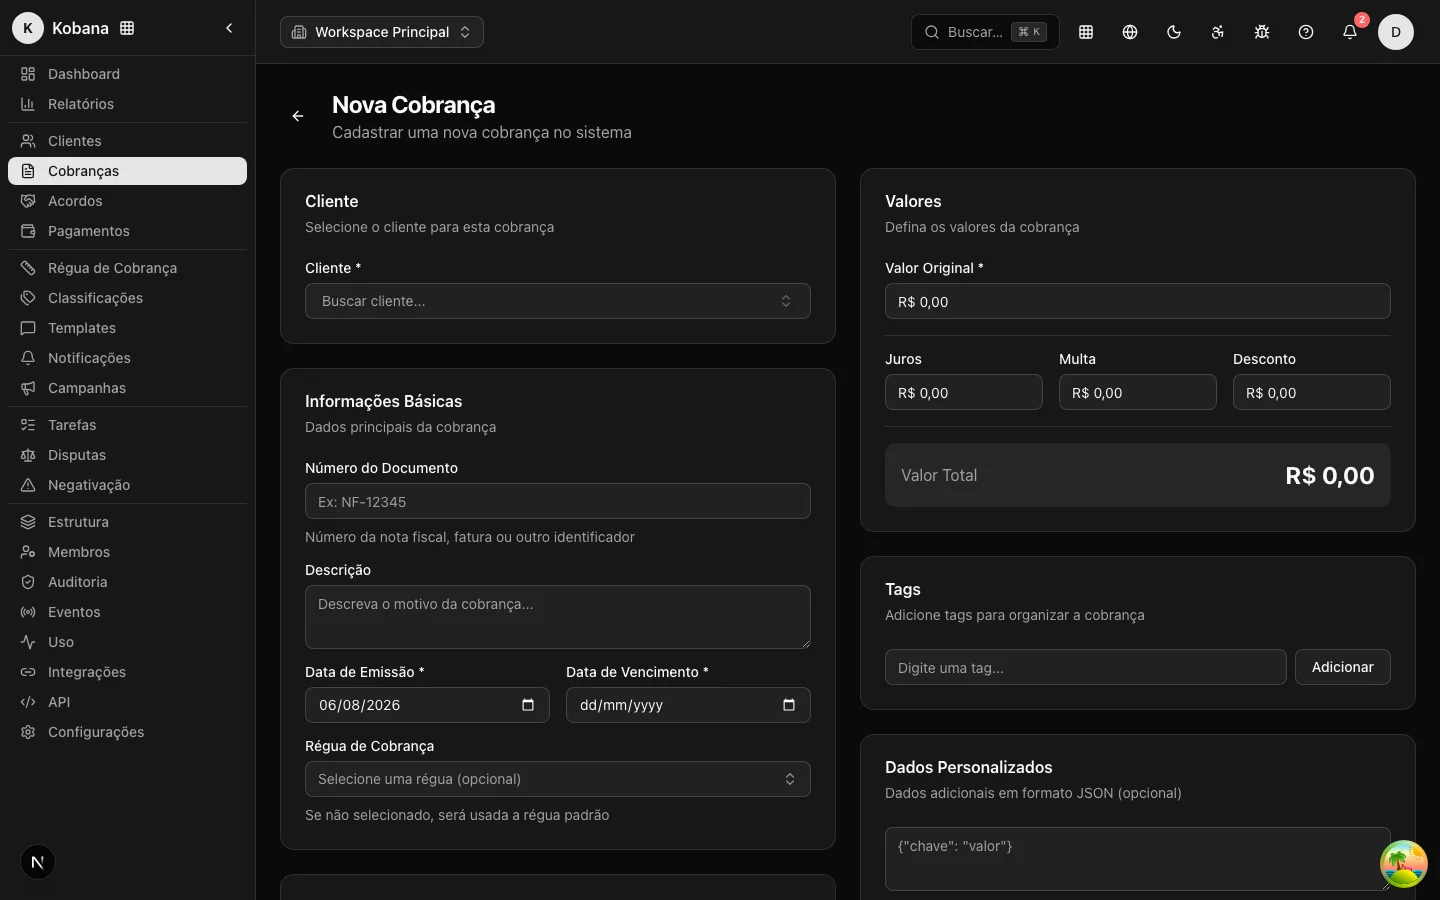
- Open Charges and click New Charge.
- Under Customer, search by name or document (type at least 2 characters) and select the person you just registered.
- Under Basic Information, fill in the Issue Date and the Due Date. The Document Number (invoice number) and the Description are optional, but they help the debtor recognize the debt.
- Under Amounts, enter the Original Amount. Interest, fine, and discount are optional; the Total Amount is calculated instantly.
- The Collection Rule field can be left blank: in that case the system uses the rule marked as Default. If you want different treatment, select another rule.
- Optionally, fill in the Payment Details (boleto, Pix copy-and-paste code, or payment link) so messages go out "payable" from the start.
- Click Create Charge.
3. The rule takes over
From here on, you do not need to do anything. The charge enrolls in the rule and:
- Receives the steps at the right time: a reminder before the due date, a notice on the day, progressively firmer messages afterwards — each through the channel configured on the step (email, SMS, or WhatsApp).
- Respects the legal contact windows of the debtor's state: a message outside allowed hours is rescheduled, never discarded.
- Stops immediately if payment is confirmed, if the debtor opens a dispute or says "I already paid", or if there is an opt-out.
:::tip Sending channel configured? While no sending channel (email, SMS, or WhatsApp) is configured on the account, the system simulates sends — you see the rule working without any real message going out. Configure channels under Settings. :::
4. Follow along
Open the charge in the Charges list to see:
- Current Status, amounts, and Days Overdue.
- Collection Rule: the version the charge enrolled in, the Current Step, and the reason for any pauses.
- Engine executions: each step evaluated, with its result (Scheduled, Sent, Delivered, Suppressed...) and why.
- Notification History: the timeline of messages sent, with recipient and delivery status.
On the Dashboard, the charge starts counting toward the portfolio cards. When it is paid, settlement happens on its own and any pending send is cancelled — see Payment and settlement.