Rollout: account and portfolio
First half of the rollout: make the account yours and get the portfolio into the system. By the end of this page you will have structure, brand, and customers in place — the rule and the channels come next.
1. Structure the account
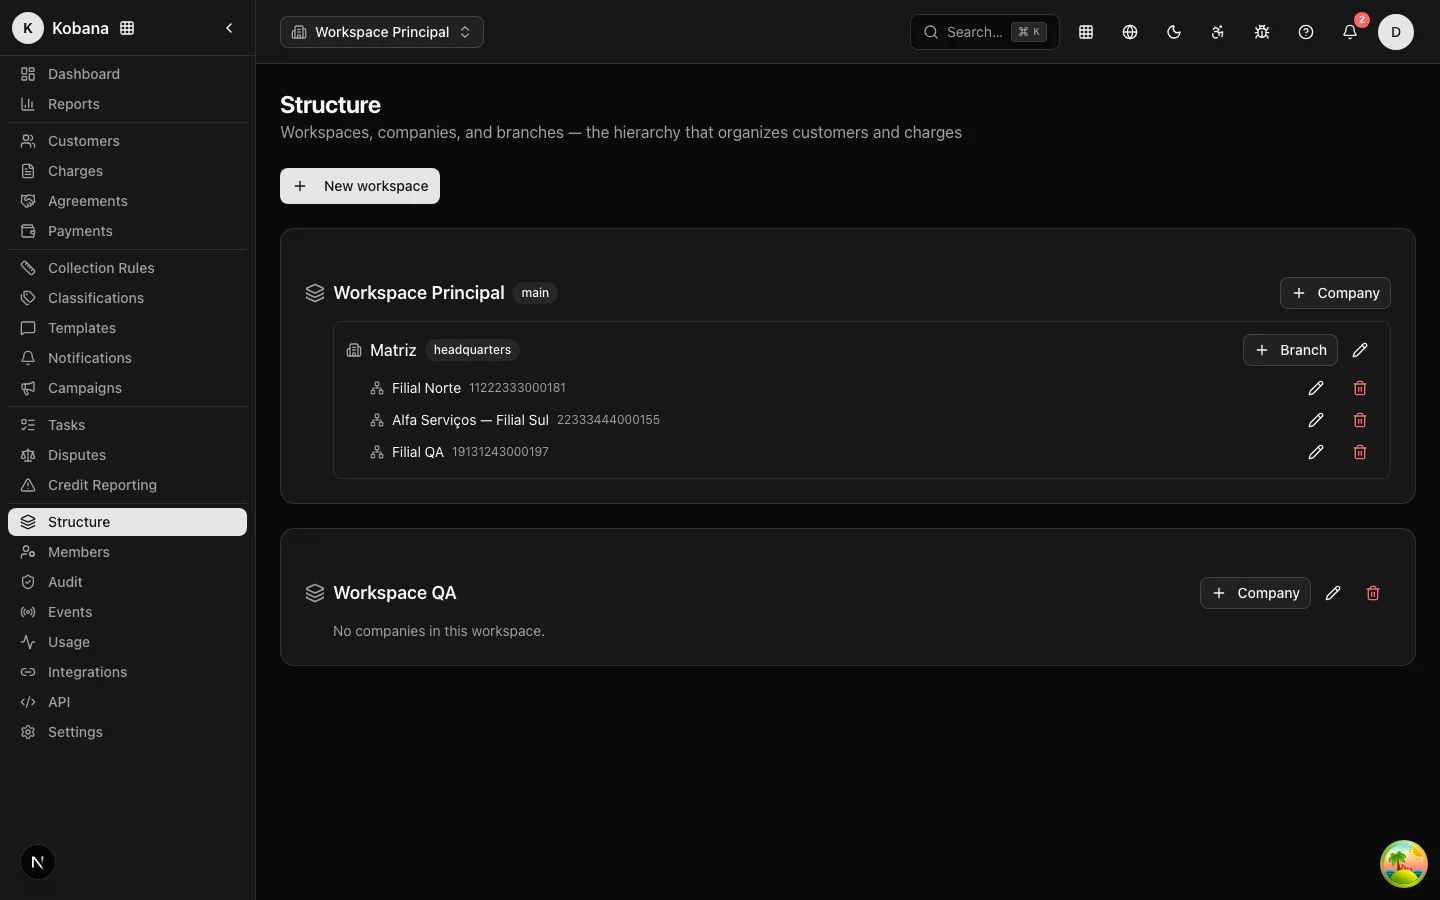
Your operation is organized in three levels: Organization → Company (creditor) → Branch. The hierarchy is managed on the Structure page in the sidebar menu, and the active slice is chosen in the context selector at the top of the screen.
- Simple operation (one company, no branches): create nothing — the default context covers everything, and you never need to touch the selector.
- Group with multiple brands or operations: create one company per creditor, with its CNPJ. Customers belong to the company; charges, rules, classifications, and templates belong to the branch (or the headquarters).
Details in Organizational structure.
2. Dress the product in your brand
In Settings → Company, fill in the legal name, trade name, CNPJ, contact details, and the logo. This is not cosmetic record-keeping: the app's sidebar and the debtor portal display your brand — the debtor who opens the negotiation link never sees ours.
For collection emails, set up an email layout: the HTML envelope with your header and footer. Resolution is cascading (branch → company → organization → built-in layout), which lets each brand in the group send with the right identity. Include the creditor's legal name and contact details in the footer — clearly identifying the collector is good practice and reduces spam flagging.
3. Invite the team
In Settings → Users, invite the operators and assign roles. Permissions follow the dunning.dashboard.<resource>.<action> catalog — give each person what the job requires, and nothing more. See Members and permissions.
4. Import the portfolio
Two paths, which can coexist:
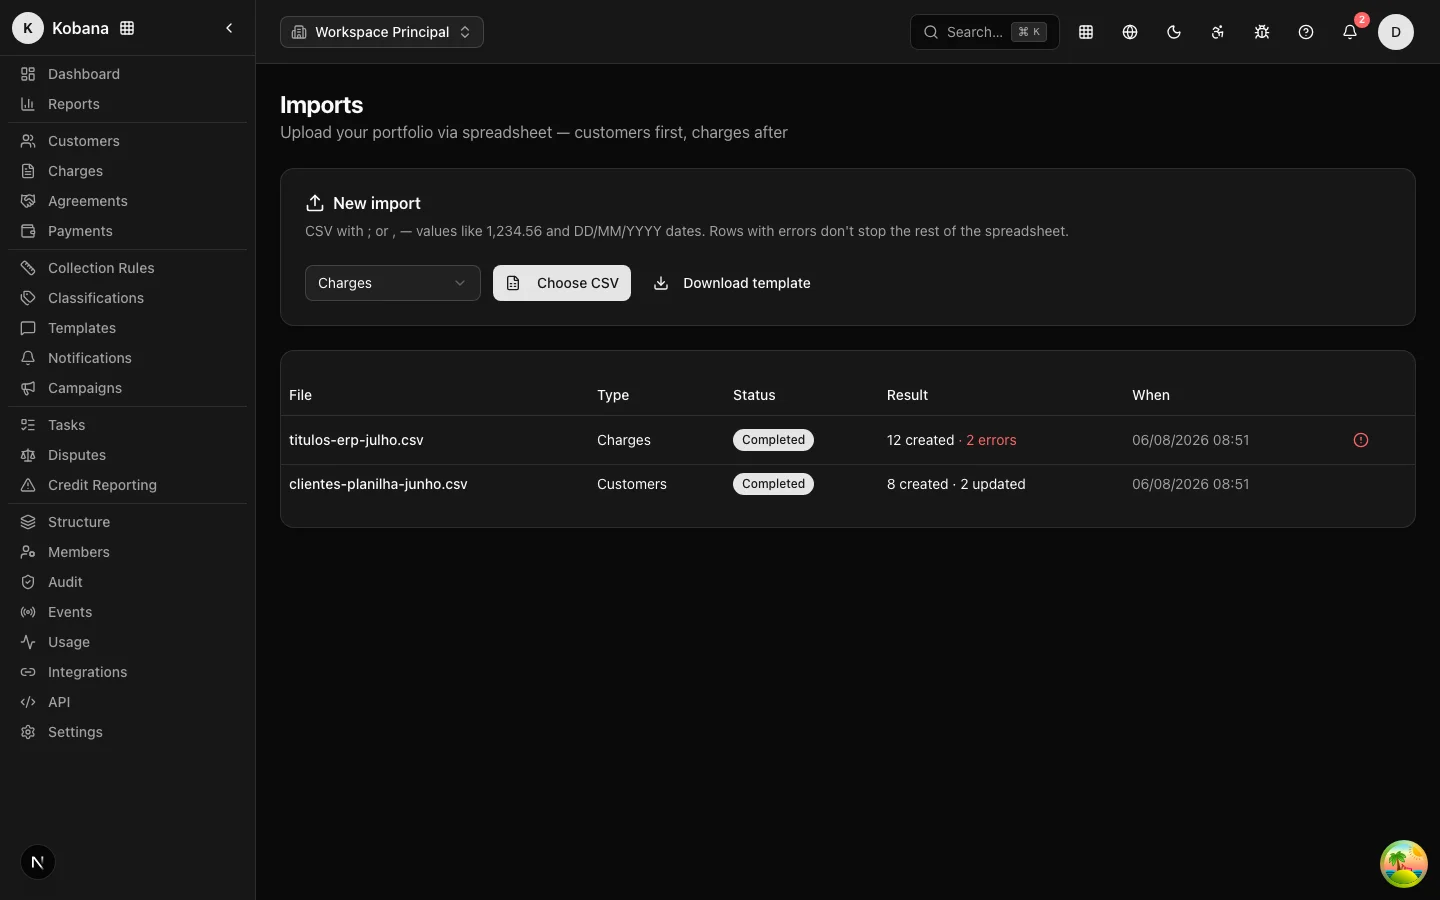
By spreadsheet — on the Imports page, upload a CSV of customers first, charges second (a charge row references its customer by document or external_id; nonexistent customer = rejected row). The format is everyday Brazilian CSV: ; or ,, amounts like 1.234,56, dates DD/MM/YYYY. The Download template button generates a sample file. Rows with errors do not sink the rest — the "View errors" link lists, row by row, what to fix and re-import. Once processing finishes, the file's content is deleted (LGPD); the metadata stays. Everything in Spreadsheet import.
Through the API — POST /people and POST /charges, covered in the integrator's guide.
Three precautions worth gold at go-live:
external_idalways: it is the deduplication key. Re-importing or re-sending with the sameexternal_idupdates instead of duplicating.- A contact on every customer: without an email or phone, the rule has nowhere to send — the channel is simply skipped.
- Address with a state (UF): the legal contact window is resolved by the debtor's state; without a valid one, the conservative national rule applies.
5. Classify (optional, but powerful)
Classifications label the payer profile (New, Good, Regular, Bad...) — manually or automatically from payment history. Rules can be tied to classifications: that is how you treat different portfolios with different rules (strategic customers with a softer rule, for example).
How to know this stage is done
- The structure mirrors your real operation and the context selector shows the expected slices.
- Logo and trade name appear in the sidebar; the email layout carries your brand and a footer with the creditor's details.
- Customer and charge imports finished with zero pending errors (or the known errors were deliberately discarded).
- A sample of customers verified: document, email/phone, address with state,
external_id.
Next step: design and publish the rule, and turn on the channels.